Data Review
 After hitting the magnifying glass icon in the upper left corner of the stopwatch screen, a window similar to the one above will appear. (The only differences will be due to device type and orientation.) This screen gives you options to store the current race and create tables showing the data from this race -- and previously stored races. From these tables email can be sent to share the data with others.
The options in the initial screen are:
After hitting the magnifying glass icon in the upper left corner of the stopwatch screen, a window similar to the one above will appear. (The only differences will be due to device type and orientation.) This screen gives you options to store the current race and create tables showing the data from this race -- and previously stored races. From these tables email can be sent to share the data with others.
The options in the initial screen are:
- Save Data
- Selecting this option takes you to a screen from which the current data can be saved. Saved data will be uploaded to iCloud if you have the iCloud service set up. Details below
- Review Saved Data
- Selecting this option brings you to a screen from which you can select from current and past data to be presented in easy to read tables. Details below
- Review Current Data
- Immediately generates tables for the current data.
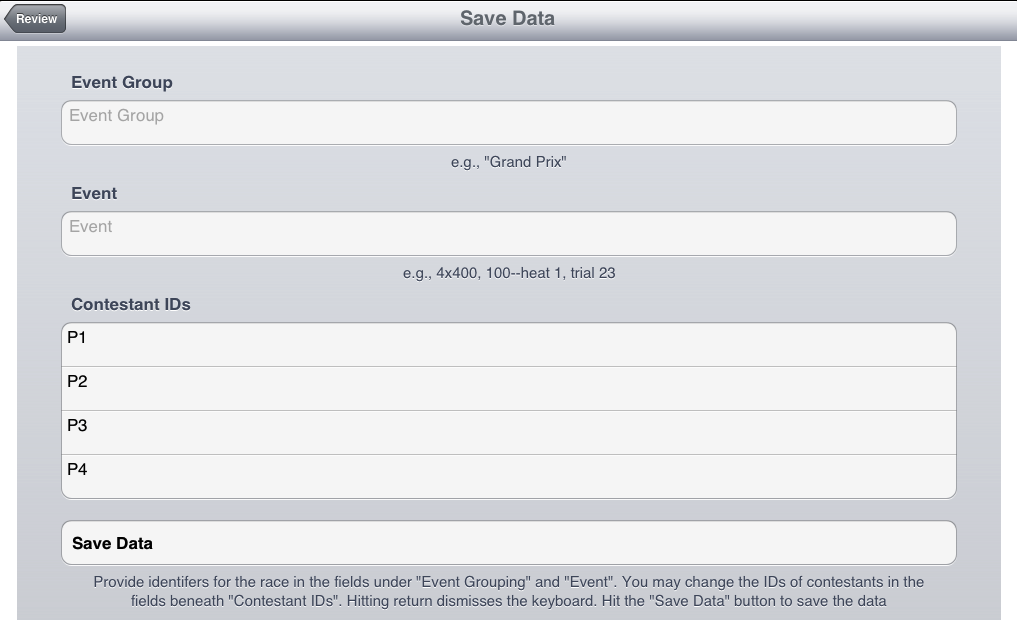
Save Data
The screen for saving data will be similar to the one shown above. (You can always get the to the save data screen in this way. Also, when the global clock is stopped and there is data to be saved, then a button taking you directly to this screen will appear on the timing screen.) On this screen you can name the "Event Group" and the event as well as change the ID of any contestant. For instance, the event group might be "Olympic Swimming 2012" and the event might be "Men 100 Free". (You cannot set the name of the contestant anywhere else in single timer mode.) Once you are happy with the information on this screen, hit the "save data" button.
You can also use this screen to change contestant names at any time. To do so: change the contestant names as you desire then tap on the "Review" button in the top left corner of the screen. This will change the names of the contestant names in the current race without saving the race data. (Generally it is easier to change the names on the timing screen.)
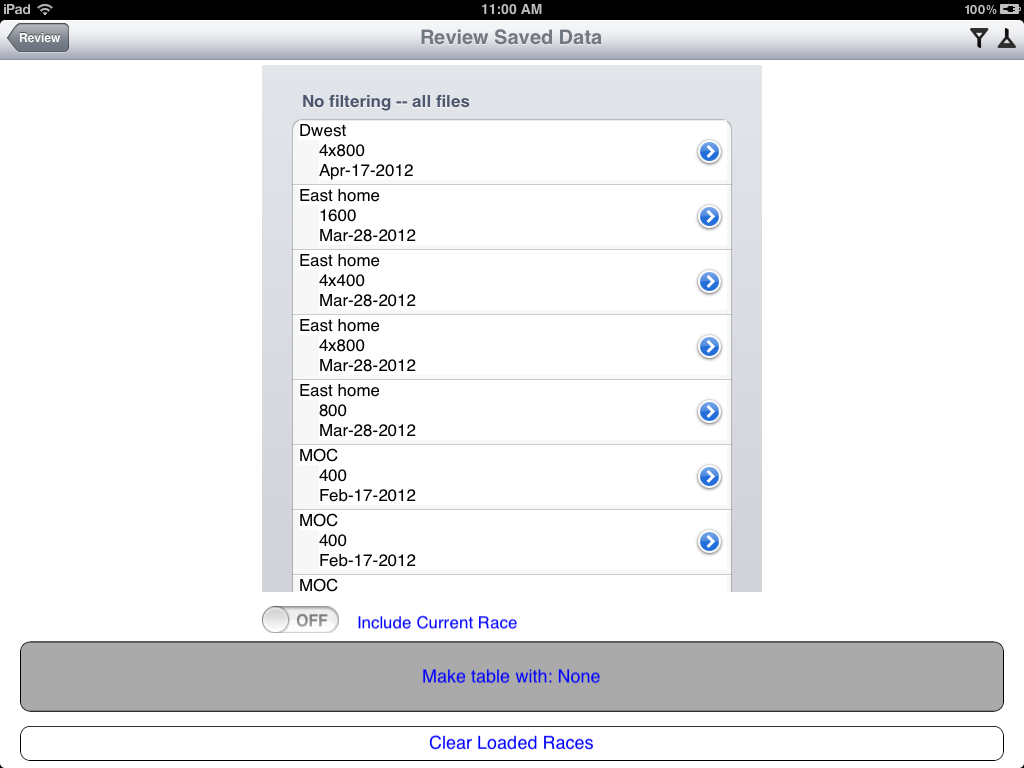
Review Saved Data
The first step in reviewing saved data is to select the data to be reviewed. Do this by tapping on events in the list in middle of the screen. As you select events, the grey "Make table with ..." button will accumulate a list of all of the events you selected. Tap on this button to generate a table.
There are several additional elements on this screen to help with building summary tables.
- "Include Current Race" -- center, below list of stored races
Turing the switch to "ON" will include the current race in the generated tables. Note that if the timer is running, the data for the current race will not include the current lap.
- Accessory buttons on the right side of each line in the event list.
Tapping on this button brings you to a window for editing / deleting this record. This is discussed more below.
- "Clear loaded races" button -- bottom of screen
Use this button if you selected an event in which you are not interested. This will clear everything (as listed in the "make table" button) so you can start anew.
- Funnel icon -- upper right
Tapping on this icon opens a screen which you can use to reduce the number of items showing in the event list. When there are many stored events, reducing the number shown can be very helpful. This is discussed more below.
- Upside-down finnel in upper right
Tapping on this icon clears any filtering. Hence, all events will appear in the event list.
|
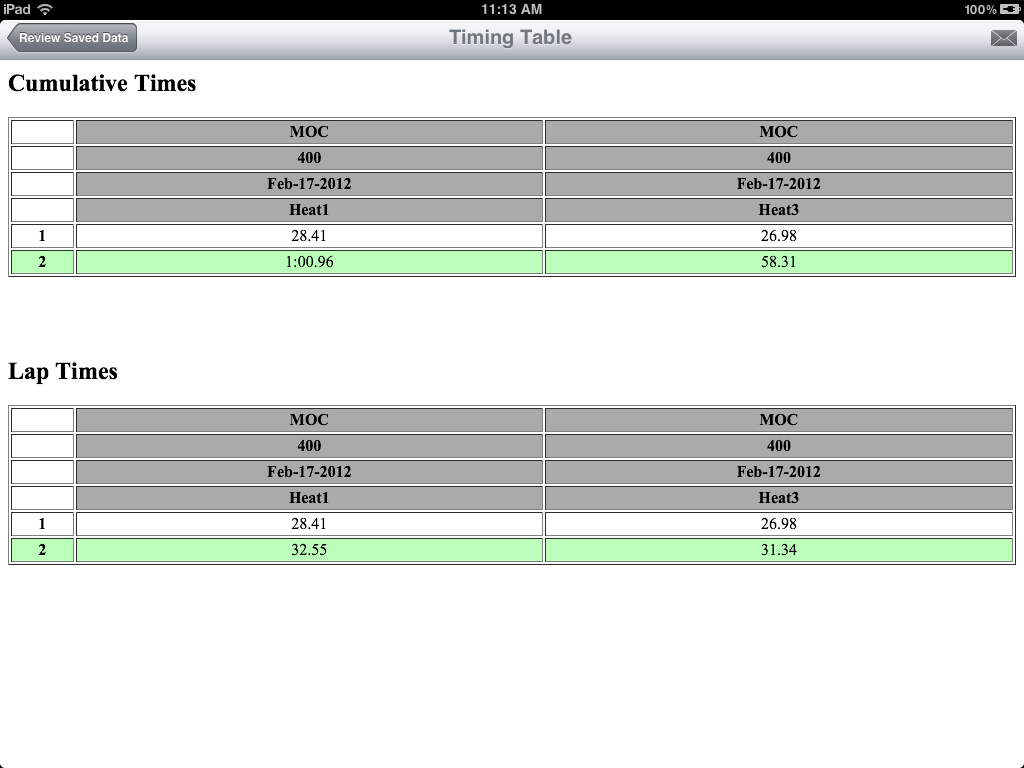
Tapping on the "Make table with: ..." button will generate a table similar to the one shown in the above image. (You can configure the program to show each event in a row rather than a column.) In the upper right corner of this screen is a small envelope icon. Tapping on this will open a screen on which you can select how you want to email the displayed tables. The first option is "send stats as html". This will open a new window to send exactly the tables shown on the screen. The second option "send stats in CSV attachment" will send the same data as that which appears on the screen, but in an attachment that can easily be imported into spreadsheets.
|
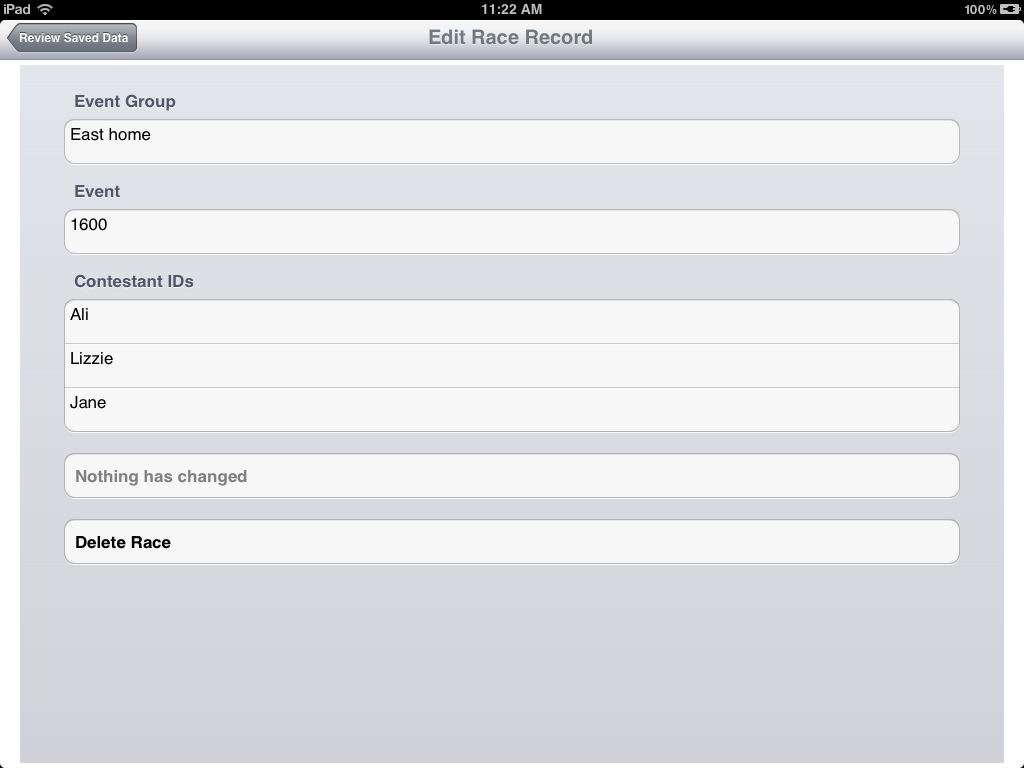
Tapping on the accessory button in the list of events will bring you to a screen similar to the one shown above, and similar to the one for saving data. The difference is that this screen is for editing or deleting saved data. On this screen you can change event groups and event names as well as names of competitors. You cannot change timings. If you change any of these, the item near the bottom labeled "Nothing had Changed" will itself change to "Save changes to this event". Hit this button to save.
Finally, the bottom button on this screen allows you to delete the record of an event.
|
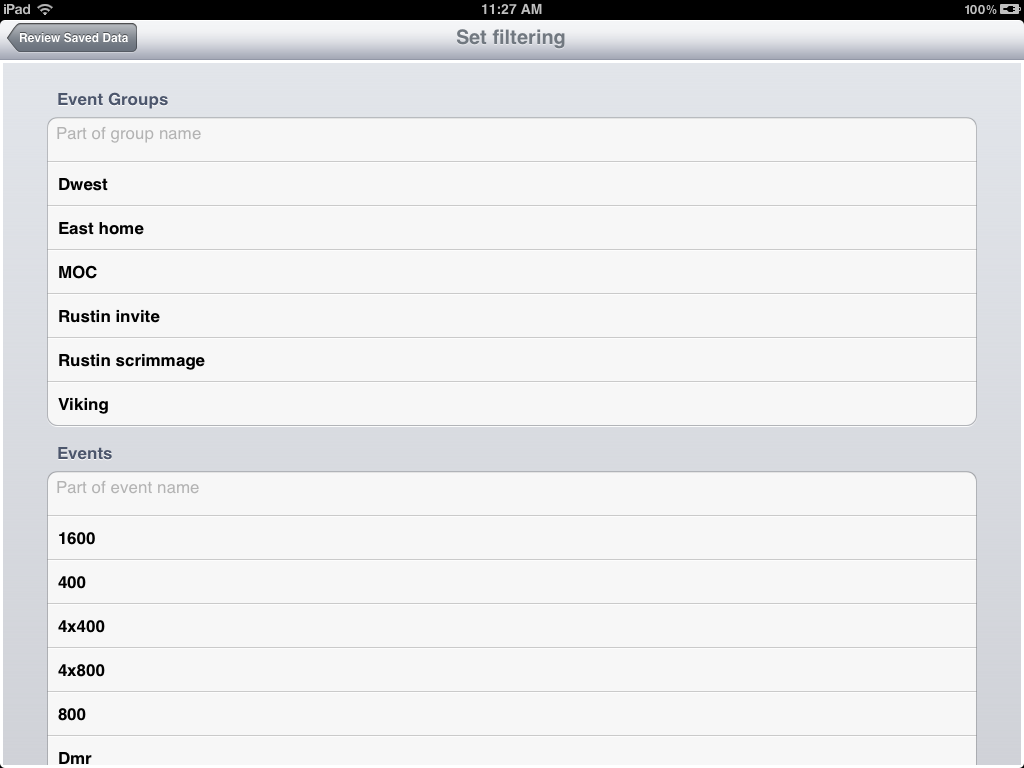
Tapping the funnel icon in the upper right brigs you to the screen shown above. The purpose of this screen is to allow you to pare down the list of events shown, thereby making it easier to generate interesting tables. There are two ways perform this filtering. First, each event name, event group and event date is listed. Selecting any one of these will result in seeing only those events that exactly match the selection. Second, the first line each section other than "Dates" provides a space for entering free text. Using this will result in finding all items that contain the entered text. For example, if you put enter "a" into the text area in "Event group" section, then you would get all events whose event group contains the letter "a". In addition, the second line in the "Contestant Ids" section provides an area for entering the exact contestant ID in which you are interested.
Review Current Data
This generates tables identical to the ones from the review of old data, but containing only the current data.